Paolo Amoroso's Journal

v20mbc

Delivering files to the Z80-MBC2 and V20-MBC homebrew computers is an essential capability for bringing new software and data to these CP/M devices.

In particular I need a file upload capability, a way of transferring text files from the host system to the remote CP/M devices. Why just text? Because a text stream is the lowest common denominator. The simplest, most ubiquitous, and versatile communication channel.

Encoding binary files as text, such as the Intel HEX format for executables or uuencoding, enables moving arbitrary files over text streams.

The problem

I want to transfer files in the most practical way, i.e. via the serial USB connection from the host system, my Chromebox (where the terminal emulator for controlling the devices runs under Crostini Linux), to the remote devices. I could copy the files to the microSD cards the homebrew computers use to simulate storage devices like hard disks, but this would require additional steps.

An obvious solution would be a file transfer protocol like the XMODEM utility that comes with the Z80-MBC2. But XMODEM file upload to the Z80-MBC2 has issues and the V20-MBC doesn't have XMODEM or other file transfer software preinstalled.

My initial workaround, dumping a text file from the terminal into a CP/M text editor, does the job but creates friction. I wanted a minimal upload channel with less friction, that relies only on native CP/M features, and can work also on the V20-MBC.

The solution: a minimal file transfer channel

I came up with a similar but more streamlined solution.

Like in the workaround, on Linux the process consists in dumping a text file from the terminal emulator.

But on CP/M, instead of running the ed editor to collect the file and manually save it, PIP automatically receives and saves the file. An additional advantage is PIP can handle arbitrarily long files whereas ed is limited to available memory.

There's a reason the CP/M system utility PIP is called Peripheral Interchange Program — emphasis mine. In addition to copying, renaming, and combining files, PIP can transfer data to and from the console and other peripherals. The new transfer channel relies on this feature by receiving the text coming from the console associated with the terminal emulator, and saving it to a file.

The process

How does transfers over this channel work? I initiate file uploads on Linux from the Minicom terminal emulator.

First, to introduce a character trasmission delay I change Minicom's settings with the Ctrl-A T F command, Terminal settings > Character tx delay (ms). A value of 1 ms works well on both the Z80-MBC2 and the V20-MBC.

Why a delay? Although the homebrew computers are connected via a 115200 bps serial link, these 8-bit and 16-bit systems can't keep up with the full speed with which the 64-bit Intel i7 Chrombox can pump data. Hence the need for a transmission delay.

Next, at the CP/M prompt I launch PIP:

G>pip filename.txt=con:

Since the destination of the data before the = symbol preceeds the source, the command instructs PIP save to FILENAME.TXT the data coming from the logical device con:, the source. By default CON: is associated with the console, i.e. Minicom on Linux.

The above command makes PIP receive the text stream Minicom sends over the serial line as if typed by the user at the keyboard. How can Minicom type text virtually? The program's Ctrl-A Y Paste file command allows to select and dump a Linux file, which is the last step of the transfer.

Then, on CP/M, the incoming text is saved to a file and rapidly printed on the screen line by line. The transfer may take up to a few minutes depending on the file size.

When PIP terminates, the new file is ready. A caveat is CP/M expects text files to be encoded with specific line break and end of file control characters, i.e. ^M^J and ^Z, not ^J and ^D like on Linux. If the end of file is missing, PIP pauses until the ^Z keystroke is entered manually.

The procedure works well on both the Z80-MBC2 and the V20-MBC.

Next steps

Dumping text files over a serial line is slow and more involved than dedicated file transfer protocols such as XMODEM, and works only one file at a time.

But text streams are universal, easy to use, and reliable. More importantly, these streams are the only way of uploading binary files encoded as text, such as executable programs not already stored on the remote device. For example, neither XMODEM nor other file transfer utilities are preinstalled under CP/M-86 on the V20-MBC.

I'll leverage this text channel to upload to the V20-MBC the Kermit communication program, which implements the transfer protocol by the same name. I'll see if Kermit can upload from Linux to the V20-MBC, and then the Z80-MBC2.

#z80mbc2 #v20mbc #retrocomputing

Discuss... Email | Reply @amoroso@fosstodon.org

Getting errors for basic disk access functions was a reminder WordStar must be configured for the CP/M system it runs on. The garbled text WordStar 3.30 rendered on the terminal under CP/M-86 on the V20-MBC drove the point home. Setting the terminal type to ANSI with the configuration utility WINSTALL.CMD fixed the issue.

#v20mbc #retrocomputing

Discuss... Email | Reply @amoroso@fosstodon.org

My memories of WordStar are fuzzy as I haven't been using it since the late 1980s and, even then, only on MS-DOS and not set up by me. So the errors for basic disk drive access functions I got from WordStar on CP/M surprised me.

My Z80-MBC2 and V20-MBC computers come with the word processor preinstalled, which runs under CP/M-80 on the former and CP/M-86 on the latter.

The e: drive holds the WordStar Release 4 files on the Z80-MBC2 with CP/M 3.0. I got an error about the program not finding its overlay files when starting it from a different drive, e.g. executing e:ws from F:. And the program's L command to change the logged drive to one other than A: or B: issued a file not found error.

Reading the manual clarified that, on CP/M-80, WordStar recognizes only A: and B: by default, but other drives can be accessed by installing the program with the INSTALL.COM utility or configuring it with WSCHANGE.COM.

The INSTALL.COM executable that ships with the Z80-MBC2 is designed for a version of WordStar different from the release 4 actually on the microcomputer. Therefore, I had to run WSCHANGE to change the settings with the option C (Computer: Disk Drives, WordStar Files > A (Disk Drives, Valid disk drives) > A (Valid disk drives).

The resulting configuration screen listed the valid disk drives, i.e. the floppy drives A: and B:, with the default where WordStar looks for the overlay files marked with an asterisk:

WordStar valid drive configuration screen.

The screen also allowed to add the letters of valid drives one by one, with the first set as the default drive. I typed E as that's where WordStar's files are on the Z80-MBC2 under CP/M 3.0. Then I added more drive letters as the mciroSD storage of the device emulates the hard disks from A: to P:. For each drive I answered no to the question on whether it's a floppy:

WordStar valid drive configuration screen.

Finally, the configuration program listed the new valid drives, i.e. A: through P: with E: coming first to indicate the default drive:

WordStar valid drive configuration screen.

On the V20-MBC under CP/M-86, WordStar release 3.30 detects all the drives A: to P: out of the box, but the default drive where the program looks for its files still needed to be configured. No WSCHANGE utility comes with the word processor on my device, so I used the installation program WINSTALL.CMD to set C: as the default. C is where WordStar's files are stored on the V20-MBC.

#z80mbc2 #v20mbc #retrocomputing

Discuss... Email | Reply @amoroso@fosstodon.org

Once the V20-MBC or Z80-MBC2 is plugged into a USB port of my Chromebox, starting a Minicom terminal emulator session makes the remote device boot up and display progress messages.

At some point, with the V20-MBC, starting Minicom did nothing and only the terminal printed its signon messages. The remote device wouldn't boot and there were no signs of life other than the lit LEDs.

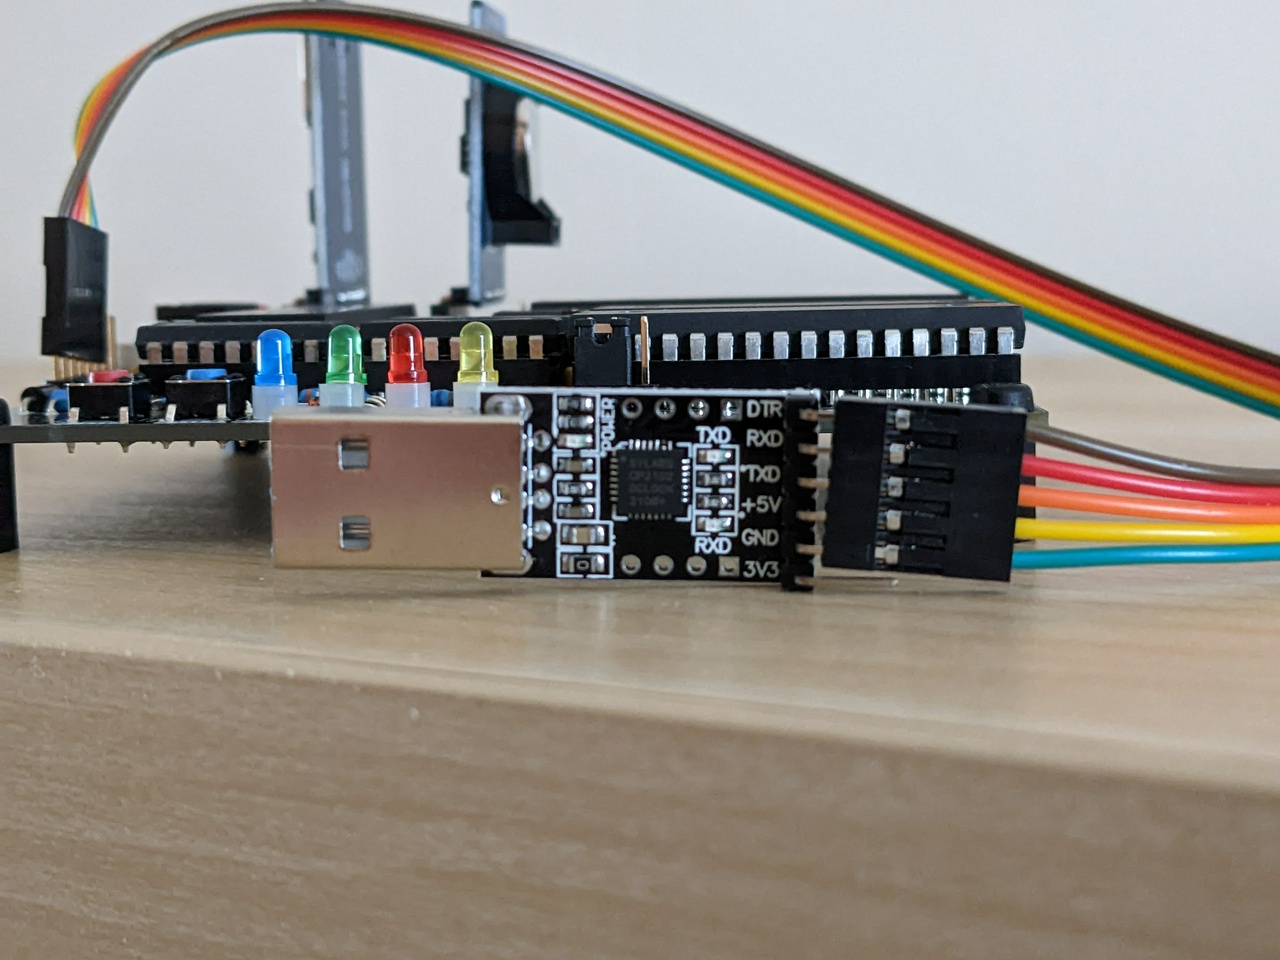
The flat cable that runs from the V20-MBC ends in a serial-USB adapter with a USB connector that goes into the Chromebox. This is the adapter card with the USB connector at left and, at right, the pins the cable's connector plugs into:

Serial-USB adapter of the V20-MBC Nec V20 homebrew computer.

To troubleshoot the issue I unplugged the USB connector from the Chromebox, which is when the cable's connector came out from the pins. That made clear the issue was a loose plug. Plugging the adapter back into the cable, reconnecting to the Chromebox, and starting Minicom made the V20-MBC automatically boot up as usual.

#v20mbc #sbc

Discuss... Email | Reply @amoroso@fosstodon.org

Just4Fun, the maker of the Z80-MBC2 and V20-MBC homebrew computers, clarfied to me the absence of some files is intentional.

Under CP/M-86, the TOD.CMD command for displaying and changing the date and time was left out because, on the V20-MBC, the date can be changed only from the boot and configuration menu. ASSIGN.CMD, a command for assigning physical to logical devices, is specific to the CP/M-86 version for the IBM PC and hence redundant on the V20-MBC.

Just4Fun doesn't recall exactly, but the absence of the Turbo Pascal sample .PAS files on the Z80-MBC2 is likely a consequence of the development process, possibly an early mass storage space constraint.

#v20mbc #z80mbc2 #sbc

Discuss... Email | Reply @amoroso@fosstodon.org

The V20-MBC homebrew computer I ordered finally arrived and I started checking it out.

The V20-MBC is a single-board computer by the same maker of the Z80-MBC2. Most of the design is common to both. However, unlike the Z80-MBC2, instead of a Z80 the V20-MBC has a Nec V20 chip that implements the instruction sets of the Intel 8080, which runs CP/M-80 2.2 on the V20-MBC, and the Intel 8088 with CP/M-86 1.1.

I got a V20-MBC Black Edition. It's a version of the V20-MBC with higher quality parts and a black PCB that, along with most of the other components also black, makes for a slick look:

V20-MBC homebrew computer.

I already love the device. These notes are my early impressions, but I'll continue sharing my experience with the V20-MBC.

Hardware

Both homebrew computers have similar size and layout and are accessed the same way, i.e. with a terminal emulator running on a desktop computer, a Chromebox in my case, connected via a USB serial line. Here is the setup, with the Chromebox at the top:

V20-MBC homebrew computer connected to a Chromebox.

The performance of the 8088 of the Nec V20 under CP/M-86 is noticeably better than the Z80-based Z80-MBC2. I estimate CP/M-86 software on the V20-MBC is 2-3X as fast as CP/M-80 programs on the Z80-MBC2.

Software

The V20-MBC is operated the same way as the Z80-MBC2, except for a couple of differences.

To account for the two CPUs, the boot and configuration menu duplicates the entries that load executable code. This is the menu in a Minicom terminal emulator session under Crostini Linux on the Chromebox:

V20-MBC boot and configuration menu.

There are two options for uploading an executable in Intel HEX format to run on the bare hardware with no operating system, iLoad for 8086 code and iLoad-80 for Intel 8080 code. Similarly, Autoboot automatically boots a designated 8086 binary, Autoboot-80 an 8080 one.

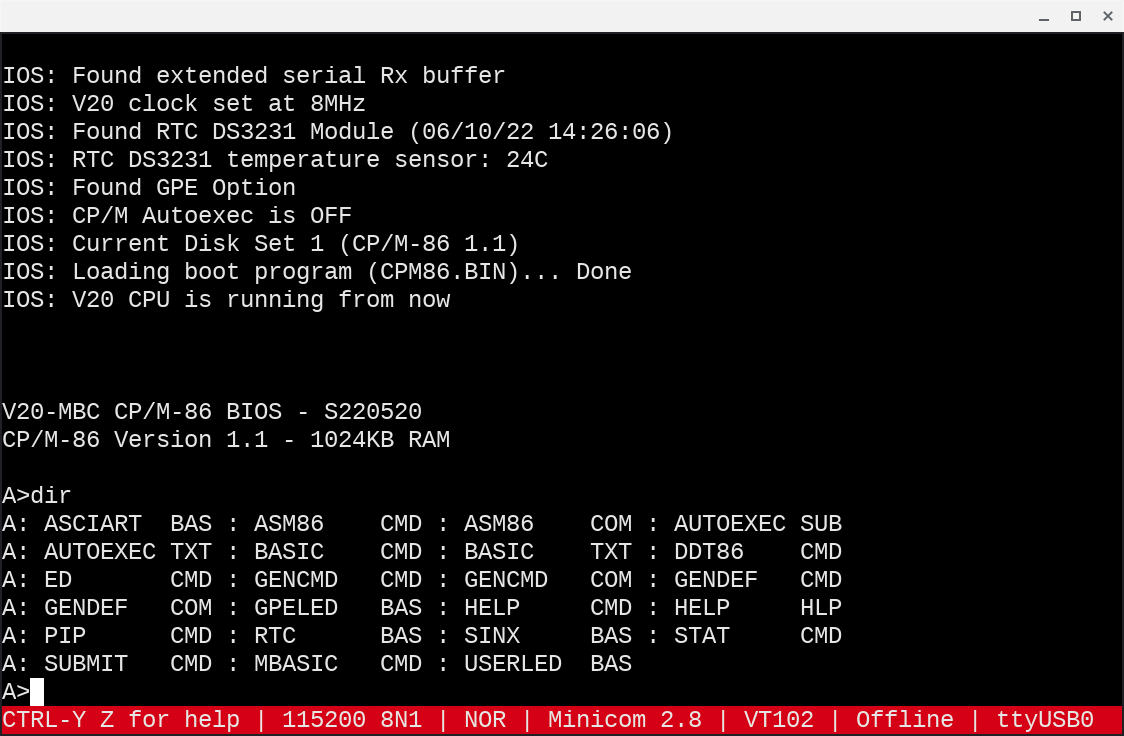
Although I never used CP/M-86 before, thanks to my prior experience with CP/M-80 the 16-bit operating system looks familiar and I already feel productive. Aside from the additional transient commands of CP/M-86, the only major difference is executable program files have the .CMD extension instead of .COM as on CP/M-80. This screenshot of the A: drive directory shows the extensions:

CP/M-86 session on a V20-MBC homebrew computer.

Issues

A quick check reveals some CP/M-86 files are missing, such as the TOD.CMD and ASSIGN.CMD transient commands. This is not unexpected as the Z80-MBC2 is also missing some files, e.g. STAT.COM and the Turbo Pascal sample .PAS sources. No big deal, it's easy to find and download suitable replacements.

#v20mbc #sbc #retrocomputing

Discuss... Email | Reply @amoroso@fosstodon.org

I couldn't resist. I ordered an assembled V20-MBC Black Edition kit with 1 MB RAM, a homebrew computer by the same prolific maker of the Z80-MBC2. The devices share the same design, except instead of a Z80 like the Z80-MBC2 the V20-MBC features a Nec V20 bundling the 8088 and 8080 CPUs.

It's exactly what I needed, the perfect match for running my Assembly code on actual hardware and a complement to the Z80-MBC2.

Suite8080, my suite of Intel 8080 Assembly cross-development tools, includes the assembler I use for my 8080 programs executed on the Z80-MBC2 under CP/M-80, and now also on the V20-MBC as native 8080 code. I also set up an x86 Assembly cross-development environment to create 8086 code that will run on the V20-MBC under CP/M-86. And, of course, the Z80-MBC2 lets me run Z80-specific projects.

The shipping is on its way to me, I'll share my experience with the V20-MBC.

#v20mbc #retrocomputing #sbc #x86

Discuss... Email | Reply @amoroso@fosstodon.org