Paolo Amoroso's Journal

Z80MBC2

Sometimes experimenting with the Z80-MBC2 and V20-MBC homebrew CP/M computers leaves the screen garbled or in an unusable state, usually because some program doesn't correctly handle the terminal. The Minicom terminal emulator I use for CP/M sessions has a command for clearing the screen but it may not be enough.

Since a native CP/M solution is more effective I wrote two short utilities in Assembly for properly clearing and initializing the screen.

These transient programs share the same name, CLS. One runs under CP/M-80 on the Z80-MBC2 with a Z80 processor, the other under CP/M-86 on the V20-MBC with a Nec V20 in 8088 mode. Both assume an ANSI/VT100 terminal and are launched by executing CLS at the command prompt:

A>CLS

The programs work the same way not just due to the similarity of CP/M's design across different architectures, but also because they are variations of a hello world demo that prints a text string to the console.

After defining constants for the CP/M system functions and resources they access, the CLS programs call the write string BDOS function to output a string of ANSI escape codes for clearing the screen and moving the cursor to the home position. The definition of the string ends both programs.

CLS for CP/M-80

The CLS program for CP/M-80 is written in Intel 8080 Assembly:

; Clear the screen.
;
; Runs on CP/M-80 with an ANSI/VT100 terminal.

TPA                 equ     100h
BDOS                equ     05h
WRITESTR            equ     09h             ; Write string


                    org     TPA

                    mvi     c, WRITESTR
                    lxi     d, clshome
                    call    BDOS

                    ret


; ANSI escapes:
;   clear screen      : ESC [ 2 J
;   go to screen home : ESC [ H
clshome:            db      1bh, '[2J', 1bh, '[H$'

                    end

For a short program like this that doesn't need a large stack a ret instruction is adequate to return control to CP/M.

I assembled the program with the asm80 assembler of Suite8080, my suite of 8080 Assembly cross-development tools in Python, and transferred the CLS executable to the Z80-MBC2 over the serial line.
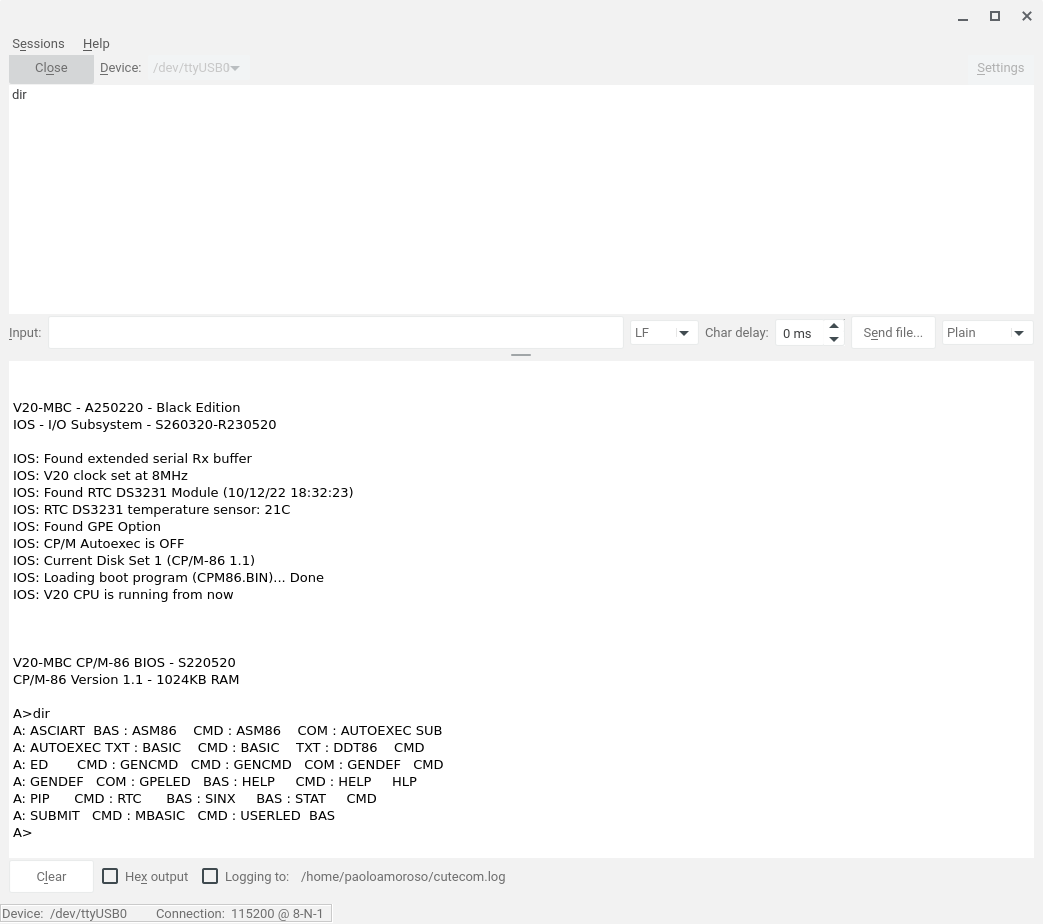
CLS for CP/M-86

CLS for CP/M-86 is written in Intel 8086 Assembly. Aside from the different instruction set and the segmentation directives, this version calls the 00h BDOS function of int 224 to return control as CP/M-86 requires:

; Clear the screen.
;
; Runs on CP/M-86 with an ANSI/VT100 terminal.


WRITESTR            equ     09h             ; BDOS function write string
TERMCPM             equ     00h             ; BDOS function terminate program


                    cseg

                    mov     cl, WRITESTR
                    lea     dx, clshome
                    int     224

                    mov     cl, TERMCPM
                    int     224


                    dseg

                    org     100h

; ANSI escapes:
;    clear screen      : ESC [ 2 J
;    go to screen home : ESC [ H
clshome             db      1bh, '[2J', 1bh, '[H$'

                    end

I transferred the Assembly source to the V20-MBC over the serial line and assembled it with the hosted ASM86 assembler that comes with CP/M-86.

#Assembly #z80mbc2 #v20mbc

Discuss... Email | Reply @amoroso@fosstodon.org

Beagle Term is a terminal emulator Chrome packaged app for controlling serial USB devices.

I checked it out with the Z80-MBC2 and the V20-MBC homebrew computers on my Chromebox and the app works well, with good VT100 emulation. A major downside is it doesn't support XMODEM or other file transfer protocols. And Google deprecated Chrome apps, so this one will eventually be discontinued.

When plugging a serial device into a USB port, chromeOS prompts to connect to the device from the Crostini Linux or the Android container. But Beagle Term runs in Chrome, so the selection isn't necessary and the notification may be dismissed.

Launching the app opens a connection configuration dialog prefilled with the default communication parameters, which are fine for the homebrew computers.

As I said VT100 emulation is pretty good. For example, here is the CatChum Pacman clone running under CP/M Plus on the Z80-MBC2:

CatChum Pcaman clone under CP/M Plus on the Z80-MBC2 homebrew computer.

And this is what WordStar 4 looks like under CP/M-86 on the V20-MBC:

WordStar under CP/M-86 on the V20-MBC homebrew computer.

Good VT100 support shouldn't be taken for granted in terminal emulators as it may be missing or broken such as in CuteCom or Serial USB Terminal.

#z80mbc2 #v20mbc #chromeOS

Discuss... Email | Reply @amoroso@fosstodon.org

The iLoad feature of the Z80-MBC2 homebrew Z80 computer allows uploading binary code that runs on the bare metal.

I thought it would be fun to try iLoad with some Intel 8080 code generated by the asm80 assembler of Suite8080, the suite of 8080 Assembly cross-development tools I'm writing in Python. But the code crashed the Z80-MBC2, uncovering a major asm80 bug.

It all started when, to practice the toolchain and process, I started with a Z80 Assembly demo that comes with the Z80-MBC2, which prints a message to the console and blinks one of the devices's LEDs. I assembled the program with the zasm Z80 and 8080 assembler, uploaded it via iLoad, and successfully ran it.

Next, I ported the blinking LED demo from Z80 to 8080 code and assembled it with asm80. But when I ran the demo on the Z80-MBC2, it crashed the device.

The baffling crash left me stuck for threee months, as I had no tools for debugging on the bare metal and there were only a few vague clues.

I carefully studied the less than a hundred lines of code and they looked fine. To isolate the issue I cut the code in half, leaving the part that prints a message to the console, and transforming the blinking demo into this bare.asm hello world for the bare metal:

OPCODE_PORT     equ     01h
EXEC_WPORT      equ     00h
TX_OPCODE       equ     01h
EOS             equ     00h
CR              equ     0dh
LF              equ     0ah


                org     0h

                jmp     start

                ds      16
stack:


start:          lxi     sp, start
                lxi     h, message
                call    puts

                hlt


message:        db      CR, LF, 'Greetings from the bare metal', CR, LF, EOS


puts:           push    psw
                push    h
puts_loop:      mov     a, m
                cpi     EOS
                jz      puts_end
                call    putc
                inx     h
                jmp     puts_loop
puts_end:       pop     h
                pop     psw
                ret


putc:           push    psw
                mvi     a, TX_OPCODE
                out     OPCODE_PORT
                pop     psw
                out     EXEC_WPORT
                ret

                end

The constants at the beginning define the addresses of the output ports, the opcode for sending a character over the serial line, and a couple of control characters. Next, the program sets up the stack and iterates over the output string to print every character.

The simplified demo program still crashed the Z80-MBC2, forcing me back to the drawing board.

Then I had an epiphany. What if the binary code asm80 generates is different from zasm's?

I fired up the dis80 disassembler of Suite8080 and compared the output of the assemblers. Sure enough, the difference jumped at me: the destination addresses of all the branches after the label message are off by 5 bytes.

The instructions branch to addresses 5 bytes lower, so the call to puts executes random string data that chrashes the device. The last correct address asm80 outputs is that of the label message. The address of the next one, puts, is wrong and leads to the crash.

Indeed, the same demo code assembled with zasm ran fine on the Z80-MBC2 and printed the expected message. This confirmed my hunch.

What now?

The next step is to find the bug in the Python source of asm80, which I'm developing with Replit. Although Replit provides a debugger, I won't use it. The tool is not well documented and I'm not sure how it works. In addition the Replit debugger is best suited to code started from the run button. This is inconvenient for command line programs like the Python scripts of Suite8080.

Therefore, I'll take the opportunity to use Python's native debugger pdb, which I always wanted to try in a real project. I played with pdb a bit and it looks easy to use, with all the commands and options handy.

Let's see if pdb can help me pinpoint the bug in the Python code.

#Suite8080 #z80mbc2 #Assembly #Python

Discuss... Email | Reply @amoroso@fosstodon.org

I'm always looking for terminal emulators and communication programs for controlling the Z80-MBC2 and V20-MBC, hoping they provide useful features Minicom misses.

That's why when stumbling upon CuteCom I eagerly checked it out. CuteCom is a graphical serial terminal program for Linux with a clean and simple user interface.

I tried it in Crostini Linux on my Chromebox connected to the Z80-MBC2 and the V20-MBC. The layout of CuteCom's window reminds me of the Serial USB Terminal app for Android which, unlike Minicom's single input and output area, has an input field separate from the output area.

The basic features of CuteCom are okay, but the program has major limitations when used with my homebrew computers. The main one is the program does no terminal emulation, doesn't support the escape codes for terminal control, and doesn't even properly align the output of a simple program like DIR. This screenshot of a V20-MBC CP/M-86 session shows the issue:

CuteCom terminal connected to a V20-MBC homebrew CP/M-86 computer.

I checked out CuteCom also with the Z80-MBC2 and tried to upload a file with XMODEM to a CP/M Plus session. However, an error informed CuteCom was unable to start the Linux program sz. There were no other clues and CuteCom has no documentation, so I have no idea what may be wrong. sz seems correctly set up under Crostini.

Given these issues, I can't unfortunately use CuteCom with the Z80-MBC2 and the V20-MBC.

The program is not a full terminal emulator to run programs that send terminal control codes to format the output. Instead, it's designed for the different use case of accessing electronic boards, embedded systems, and other devices via a serial connection, which typically produce line-oriented output.

#z80mbc2 #v20mbc

Discuss... Email | Reply @amoroso@fosstodon.org

To code on the Z80-MBC2 and V20-MBC homebrew computers I often transfer text files to and from their CP/M environments.

In one direction I send files from Crostini Linux by dumping them to CP/M, where PIP saves the text to CP/M files. In the opposite direction I run PIP on CP/M to print the files to the screen, where Minicom captures the text and saves it to files on Crostini.

CP/M and Unix have different line break and end of file encodings. In addition, the transfer process may introduce unwanted text. That's why the text files exchanged between the systems need some conversion, to automate which I wrote two short Bash scripts.

The first script, unix2cpm, converts line breaks and the end of file marker in the input to the CP/M encoding and prints the result to stdout. If the optional file name argument isn't supplied the script reads from stdin with a technique I researched. This is the script:

#!/usr/bin/env bash

# Convert line breaks and end of file from Unix to CP/M.
#
# Usage:
#
#   unix2cpm [filename]
#
# Reads from stdin if the optional argument is missing.

input_file="${1:-/dev/stdin}"

cat "$input_file" | unix2dos
echo -e -n '\x1a'

The script calls unix2dos distributed with the dos2unix / unix2dos tools. unix2dos converts line breaks from Unix to MS-DOS, which borrows the encoding from CP/M. unix2cpm needs only to append with echo the ^Z end of file control character.

Once converted, the file is ready to be dumped from Linux to CP/M.

I initiate file transfers in the oppostite direction by executing the Minicom command to capture the terminal output to a file, Ctrl-A L (Capture on/off). Then, at the CP/M prompt, I execute a command like this to print a file to the console:

A>a:pip con:=filename.txt

When printing ends and the A> prompt reappears, I turn off output capture in Minicom to close the capture file. The captured output contains the PIP command in the first line, then the text of the file, and finally the A> prompt in the last line.

To remove the unwanted first and last line I wrote the second script, skipfl (skip first and last). Again, the script reads from stdin if the optional file name isn't supplied and writes to stdout. The code is:

#!/usr/bin/env bash

# Skip the first and last file of the argument file
#
# Usage:
#
#   skipfl [filename]
#
# Reads from stdin if the optional argument is missing.

input_file="${1:-/dev/stdin}"

cat "$input_file" | sed '1d' | sed '$d'

The script calls sed to delete the first and last line with the d command.

No further processing of the captured CP/M output file is necessary as Minicom takes care of inserting the proper line break and end of file encodings.

#z80mbc2 #v20mbc #linux #retrocomputing

Discuss... Email | Reply @amoroso@fosstodon.org

Turbo Pascal 3.0 for CP/M has a display issue I noticed on the Z80-MBC2 and V20-MBC homebrew computers. When using the development environment, text in the terminal remained stuck with boldface turned on.

It was enough to launch Turbo Pascal and execute any command (e.g. compiler Options), or exit Turbo Pascal, to turn on boldface and leave it stuck in the IDE, in CCP, and when running other programs. Everything went bold such as code in source files edited in Turbo Pascal, CCP command lines, and the output of transient programs.

The issue occurred under CP/M 3.0 on the Z80-MBC2 and CP/M-86 1.1 on the V20-MBC, both accessed from the Minicom terminal emulator under Crostini Linux on my Chromebox.

I tried ANSI and VT102 emulation in Minicom and run the Turbo Pascal configuration utility TINST to set the terminal to ANSI, but the issue persisted. The only workaround was to resize the terminal window, which reinitializes the display.

I posted to comp.os.cpm for help and learnt Borland left the terminal reset string blank in the ANSI entry, which thus doesn't reset text attributes.

The fix was simple. I run TINST, selected the ANSI terminal, and edited the definition to insert the following reset string via the option Send a reset string to the terminal (the corresponding escape code strings and descriptions are below the hex values):

$1b $63    $1b  $5b $32 $4a

ESC c      ESC  [   2   J
Reset      Clear screen

ESC c is not enough as it only resets the terminal but doesn't clear the screen. With the new string the text attributes are now properly handled and the terminal is no longer stuck in boldface after using Turbo Pascal.

#z80mbc2 #v20mbc #retrocomputing

Discuss... Email | Reply @amoroso@fosstodon.org

Turbo Pascal 3 for CP/M comes preinstalled with the Z80-MBC2 and V20-MBC homebrew computers. Checking out the development environment made me rediscover Turbo Pascal and realize its potential for programming these computers.

Although I owned Turbo Pascal for MS-DOS in the early 1990s, I didn't use it much. Between other languages later getting my attention and Borland losing its market leadership, I eventually forgot about Turbo Pascal. Now, with the development environment handy on the Z80-MBC2 and V20-MBC, I began checking out the Turbo Pascal CP/M version I had never played with.

Being familiar with the Turbo Pascal MS-DOS IDE, which features a nice text user interface with pull-down menus and dialogs, the CP/M version seemed spartan and primitive.

But I pressed ahead, tried the various commands, edited and compiled some code, and got familiar with the keystrokes and workflow. I soon felt at ease with Turbo Pascal for CP/M. The environment is still suprisingly usable and productive, allowing fast edit-compile-run cycles with short compilation times even on the 8-bit Z80-MBC2.

I now understand why Turbo Pascal made such a sensation at the time and revolutionized development tools.

To learn the Turbo Pascal environment and language I began reading the manual, as well as books about Turbo Pascal and Pascal. The more I used Turbo Pascal and read about it, the more I enjoyed it and wanted to learn and explore.

Next thing I knew, I was down a rabbit hole.

This experimentation and reading made me realize the potential of Turbo Pascal as an ideal tool for hobby projects with these homebrew computers.

Pascal is an easy to understand, readbale, and expressive language. Despite the age and design flaws, it allows to write fairly advanced code. Pascal makes practicality win over language purity.

Sitting at a sweet spot between ease of use, features, and power, Turbo Pascal is a perfect fit for CP/M as it consumes limited resources, generates moderatly small and fast executables, and can access all the features of the system. That's why it's a good environment for quickly developing small tools or programs for the Z80-MBC2 and V20-MBC.

#pascal #retrocomputing #z80mbc2 #v20mbc

Discuss... Email | Reply @amoroso@fosstodon.org

On this blog I regularly share my retrocomputing experience and projects with the Z80-MBC2 and the V20-MBC homebrew computers. In addition, on my Mastodon account @amoroso@fosstodon.org I often post screenshots, links, videos, and other short updates grouped under the #z80mbc2 and #v20mbc hashtags.

#z80mbc2 #v20mbc

Discuss... Email | Reply @amoroso@fosstodon.org

Delivering files to the Z80-MBC2 and V20-MBC homebrew computers is an essential capability for bringing new software and data to these CP/M devices.

In particular I need a file upload capability, a way of transferring text files from the host system to the remote CP/M devices. Why just text? Because a text stream is the lowest common denominator. The simplest, most ubiquitous, and versatile communication channel.

Encoding binary files as text, such as the Intel HEX format for executables or uuencoding, enables moving arbitrary files over text streams.

The problem

I want to transfer files in the most practical way, i.e. via the serial USB connection from the host system, my Chromebox (where the terminal emulator for controlling the devices runs under Crostini Linux), to the remote devices. I could copy the files to the microSD cards the homebrew computers use to simulate storage devices like hard disks, but this would require additional steps.

An obvious solution would be a file transfer protocol like the XMODEM utility that comes with the Z80-MBC2. But XMODEM file upload to the Z80-MBC2 has issues and the V20-MBC doesn't have XMODEM or other file transfer software preinstalled.

My initial workaround, dumping a text file from the terminal into a CP/M text editor, does the job but creates friction. I wanted a minimal upload channel with less friction, that relies only on native CP/M features, and can work also on the V20-MBC.

The solution: a minimal file transfer channel

I came up with a similar but more streamlined solution.

Like in the workaround, on Linux the process consists in dumping a text file from the terminal emulator.

But on CP/M, instead of running the ed editor to collect the file and manually save it, PIP automatically receives and saves the file. An additional advantage is PIP can handle arbitrarily long files whereas ed is limited to available memory.

There's a reason the CP/M system utility PIP is called Peripheral Interchange Program — emphasis mine. In addition to copying, renaming, and combining files, PIP can transfer data to and from the console and other peripherals. The new transfer channel relies on this feature by receiving the text coming from the console associated with the terminal emulator, and saving it to a file.

The process

How does transfers over this channel work? I initiate file uploads on Linux from the Minicom terminal emulator.

First, to introduce a character trasmission delay I change Minicom's settings with the Ctrl-A T F command, Terminal settings > Character tx delay (ms). A value of 1 ms works well on both the Z80-MBC2 and the V20-MBC.

Why a delay? Although the homebrew computers are connected via a 115200 bps serial link, these 8-bit and 16-bit systems can't keep up with the full speed with which the 64-bit Intel i7 Chrombox can pump data. Hence the need for a transmission delay.

Next, at the CP/M prompt I launch PIP:

G>pip filename.txt=con:

Since the destination of the data before the = symbol preceeds the source, the command instructs PIP save to FILENAME.TXT the data coming from the logical device con:, the source. By default CON: is associated with the console, i.e. Minicom on Linux.

The above command makes PIP receive the text stream Minicom sends over the serial line as if typed by the user at the keyboard. How can Minicom type text virtually? The program's Ctrl-A Y Paste file command allows to select and dump a Linux file, which is the last step of the transfer.

Then, on CP/M, the incoming text is saved to a file and rapidly printed on the screen line by line. The transfer may take up to a few minutes depending on the file size.

When PIP terminates, the new file is ready. A caveat is CP/M expects text files to be encoded with specific line break and end of file control characters, i.e. ^M^J and ^Z, not ^J and ^D like on Linux. If the end of file is missing, PIP pauses until the ^Z keystroke is entered manually.

The procedure works well on both the Z80-MBC2 and the V20-MBC.

Next steps

Dumping text files over a serial line is slow and more involved than dedicated file transfer protocols such as XMODEM, and works only one file at a time.

But text streams are universal, easy to use, and reliable. More importantly, these streams are the only way of uploading binary files encoded as text, such as executable programs not already stored on the remote device. For example, neither XMODEM nor other file transfer utilities are preinstalled under CP/M-86 on the V20-MBC.

I'll leverage this text channel to upload to the V20-MBC the Kermit communication program, which implements the transfer protocol by the same name. I'll see if Kermit can upload from Linux to the V20-MBC, and then the Z80-MBC2.

#z80mbc2 #v20mbc #retrocomputing

Discuss... Email | Reply @amoroso@fosstodon.org

My memories of WordStar are fuzzy as I haven't been using it since the late 1980s and, even then, only on MS-DOS and not set up by me. So the errors for basic disk drive access functions I got from WordStar on CP/M surprised me.

My Z80-MBC2 and V20-MBC computers come with the word processor preinstalled, which runs under CP/M-80 on the former and CP/M-86 on the latter.

The e: drive holds the WordStar Release 4 files on the Z80-MBC2 with CP/M 3.0. I got an error about the program not finding its overlay files when starting it from a different drive, e.g. executing e:ws from F:. And the program's L command to change the logged drive to one other than A: or B: issued a file not found error.

Reading the manual clarified that, on CP/M-80, WordStar recognizes only A: and B: by default, but other drives can be accessed by installing the program with the INSTALL.COM utility or configuring it with WSCHANGE.COM.

The INSTALL.COM executable that ships with the Z80-MBC2 is designed for a version of WordStar different from the release 4 actually on the microcomputer. Therefore, I had to run WSCHANGE to change the settings with the option C (Computer: Disk Drives, WordStar Files > A (Disk Drives, Valid disk drives) > A (Valid disk drives).

The resulting configuration screen listed the valid disk drives, i.e. the floppy drives A: and B:, with the default where WordStar looks for the overlay files marked with an asterisk:

WordStar valid drive configuration screen.

The screen also allowed to add the letters of valid drives one by one, with the first set as the default drive. I typed E as that's where WordStar's files are on the Z80-MBC2 under CP/M 3.0. Then I added more drive letters as the mciroSD storage of the device emulates the hard disks from A: to P:. For each drive I answered no to the question on whether it's a floppy:

WordStar valid drive configuration screen.

Finally, the configuration program listed the new valid drives, i.e. A: through P: with E: coming first to indicate the default drive:

WordStar valid drive configuration screen.

On the V20-MBC under CP/M-86, WordStar release 3.30 detects all the drives A: to P: out of the box, but the default drive where the program looks for its files still needed to be configured. No WSCHANGE utility comes with the word processor on my device, so I used the installation program WINSTALL.CMD to set C: as the default. C is where WordStar's files are stored on the V20-MBC.

#z80mbc2 #v20mbc #retrocomputing

Discuss... Email | Reply @amoroso@fosstodon.org