Paolo Amoroso's Journal

Android

Reading is the main use of my new Lenovo Tab M10 Plus 3rd Gen tablet, yet I hadn't checked out its reading mode. Now I did. Reading mode sets a color palette that's easy to the eyes such as black and white, systemwide or per app. Nice, but I can get a similar effect by changing the page color to sepia in Google Play Books and other reading apps.

#Android

Discuss... Email | Reply @amoroso@fosstodon.org

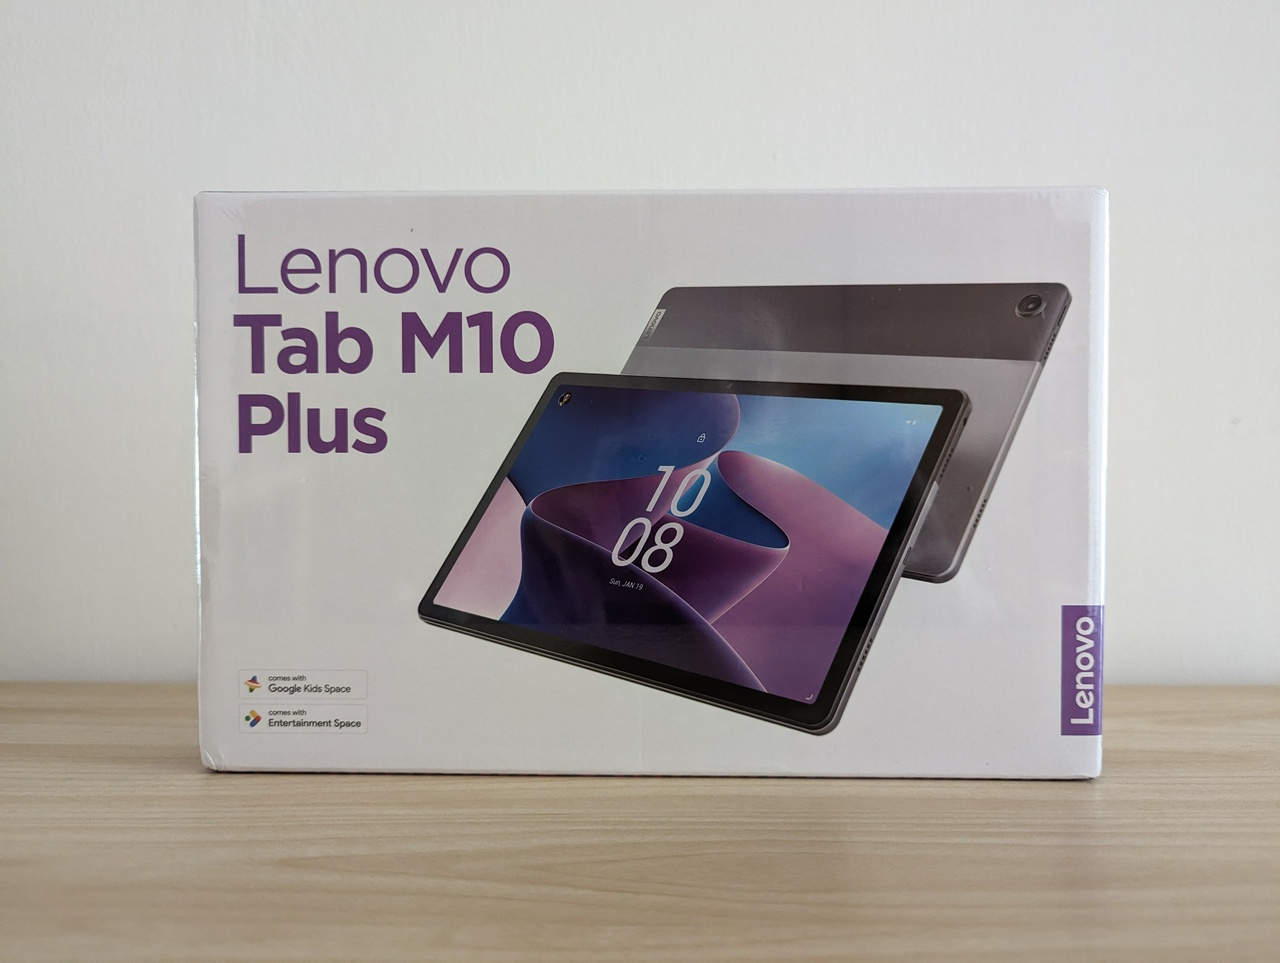
I bought a Lenovo Tab M10 Plus 3rd Gen 10.6” Android tablet to replace my old Lenovo Tab M8 HD 8” tablet. I picked this €189.00 Wi-Fi unit with 4 GB RAM and 128 GB storage:

Product box of Lenovo Tab M10 Plus 3rd Gen 10.6" Android tablet.

Motivation

The Tab M8 HD is on okay compact and light tablet with acceptable screen quality, but has a couple of issues that make it unsatisfactory for more than casual usage.

First, it's slow. Unbearably slow.

Every gesture or action comes with considerable lag. When the device boots up, it takes a lot of time to initialize and start all the processes before the system responds to user input. This is because of a combination of slow SoC and limited RAM, 2 GB for my Tab M8 HD. It's just not enough and the system is contantly swapping, with a major toll on latency.

Another issue is the 8” screen is not large enough to read wide, fixed layout documents and ebooks without workarounds.

I eventually got tired of the dog slow Tab M8 HD and its limitations and decided to replace it.

I wanted an affordable tablet with more RAM and noticeably better performance. In addition, I seeked a screen large enough to make A4 PDF documents, fixed layout ebooks, and programming ebooks with source code blocks comfortably readable, without adjusting the zoom or page settings of reading apps. Another important feature I was after is a software experience close to stock Android.

After overcoming some initial reservations about the weight and bulk of devices above 8”, I was eager to try a large tablet.

Reviews

My product research quickly homed in on the Tab M10 Plus 3rd Gen.

But at first something held me back, making me hesitate: the reviews were mixed, literally. Although the reviewers praised the design and finish, the great screen, and the price point, they expressed a wide spectrum of opinions over a feature I was very interested in, performance. Here are three representative reviews, from the most critical on performance (XDA Developers) to the most favorable (Android Police):

This range of opinions convinced me the performance of the Tab M10 Plus 3rd Gen was highly subjective. I deemed acceptable the risk of disappointment and went ahead with the purchase.

Hardware

I've been using the tablet for a few days and already love it. It finally comes with all I was looking for in such a device, adequate performance and screen real estate.

The design, material, and finish have a definitely premium look, especially at this price point. The screen is just gorgeous, bright enough and crisp. This is what the tablet looks like:

Lenovo Tab M10 Plus 3rd Gen 10.6" Android tablet.

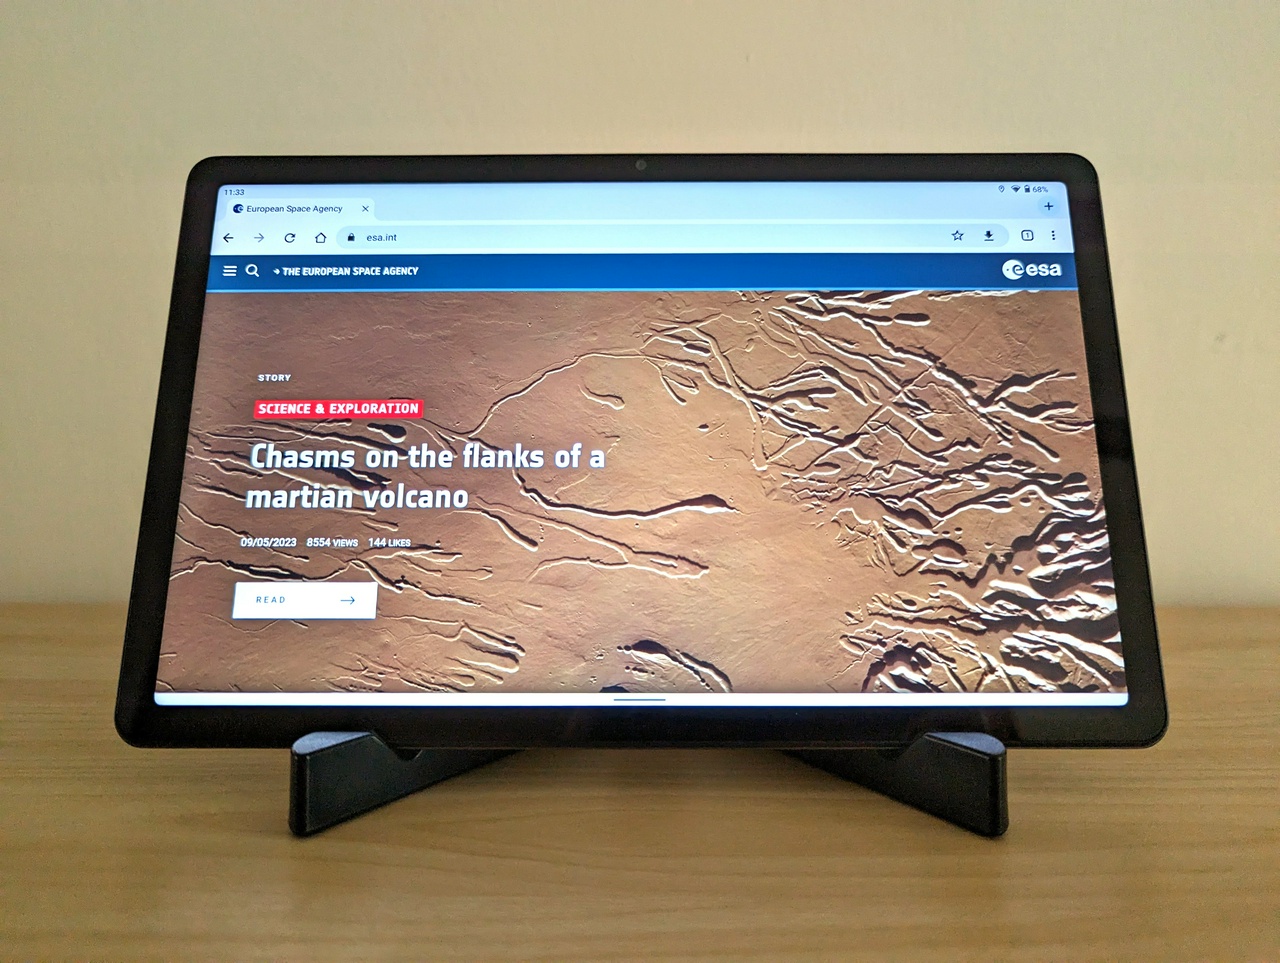
Despite the size, the device feels less heavy than I expected and I can comfortably hold it for long sessions. Although I mostly use the tablet in portrait mode, the good balance and weight are making me use it more in landscape mode. The latter orientation is more natural than I thought and the large screen gives properly optimized apps enough room to take advantage of the additional area.

Performance doesn't disappoint. While the Tab M10 Plus 3rd Gen is no top of line device (why do reviewers pitch in benchmarks a budget tablet against a premium iPad, anyway?), it's way better and more responsive than the Tab M8 HD. Which is all I wanted. With the new tablet, lag is only occasional and with a short upper bound. I can finally pick up the device and use it right when the bootstrap ends.

Although most reviewers evaluate peformance by running demanding apps such as games or media editors, I actually mostly use reading apps like ebook readers, RSS feed readers, and web browsers. This may explain the subjectivity of opinions over performance.

For the kinds of apps I run, the tablet does really well. But it can handle more resource intensive processes such as 3D graphics simulations, for example the Celestia and GlobeViewer Moon astronomy apps.

Face unlock is usable, more responsive and accurate than the Tab M8 HD.

The cameras deliver barely serviceable results only with very good lighting, otherwise the slightest darkness produces a noisy mess. But the sensors are okay for the occasional video call or QR code scan.

Battery life is very good. A full charge gets me through at least three or four days of my typical usage.

Software

Lenovo delivers devices with mostly stock Android and little bloatware, which is among the reasons I went with the vendor.

The system software of the Tab M10 Plus 3rd Gen is indeed mostly stock Android 12 with a few extra apps for operating specific features, such as a notetaking app for the Lenovo Precision 2 pen or the Dolby Atmos options in the system settings. Android 13 is coming sometime in 2023.

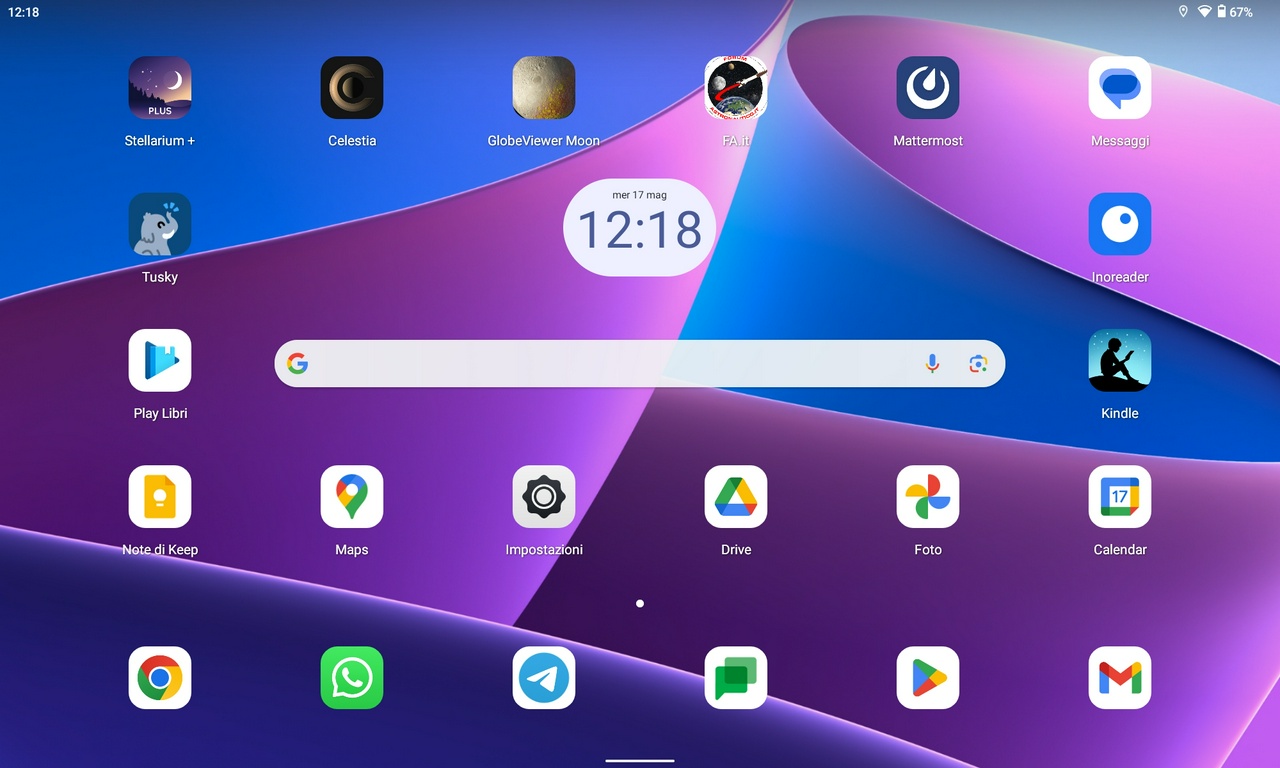
I initially set up the home screen like this with the productivity, messaging, and astronomy apps I use most:

Home screen of Lenovo Tab M10 Plus 3rd Gen 10.6" Android tablet.

The reviews noted that, over the past few years, Lenovo dialed up the bloatware a bit. But, again, I accepted the risk. The tablet does come with some bloatware in the form of over a dozen preinstalled apps and games. But, to Lenovo's credit, all can be uninstalled, a one-time task of just a few minutes.

One more tweak is needed though. Tablet Center, a preinstalled Lenovo app that provides support and warranty information, issues occasional notifications promoting support plans. Turning off the app's notifcations removes this last annoyance.

Reading

The Tab M10 Plus 3rd Gen turned out to be perfect for the digital reading I do.

I tried several digital publications with a range of layouts and formatting. The default settings of the Google Play Books and Kindle apps are all it takes to comfortably fit A4 PDF documents and fixed layout ebooks on the screen, without zooming. The same goes with reflowable ebooks that contain wide source code blocks. Nearly all lines fit within the margins with no wrapping.

No reading settings adjustments are required, no workarounds.

The 10.6” screen of the device also helps with browsing websites and reading web content. The magic of responsive layouts nicely adapts the content and fills the large screen.

Conclusion

My experience with tablets began in 2012 with the original Nexus 7. After using other 7” and 8” tablets, the Tab M10 Plus 3rd Gen finally convinced me that, for the kind of reading-centered tasks I use these devices for, bigger is better.

The Tab M10 Plus 3rd Gen has all the features I wanted, exactly the way I wanted them. I nailed it.

#Android

Discuss... Email | Reply @amoroso@fosstodon.org

As an amateur astronomer, Astrophotography mode is one reason I got my old Pixel 4 XL and my current Pixel 7 Pro.

But there’s another essential piece of gear for taking long-exposure photos of star fields or astronomical phenomena, a tripod. The one I bought for the Pixel 4 XL and now use with the Pixel 7 Pro is a Phinistec photo tripod, here with some of the included accessories:

Phinistec photo tripod with accessories: carrying pouch, smartphone adapter, Bluetooth shutter.

I do all my astrophotography from an apartment building in Milan, Italy, where I live. It’s a light-polluted urban area but these days I can’t wander around much.

I observe the sky from the apartment’s small balconies, which have the area of a medium-sized carpet. This constrains the camera holding gear I can use. I wanted a full-height tripod that can extend to at least waist level, not a tabletop tripod, as I can’t use tables or other elevated surfaces to set the photo equipment on.

The Phinistec tripod reaches a maximum height of 125 cm. It’s cheap, compact, and very light. It comes with a smartphone adapter, a Bluetooth remote shutter, a carrying pouch, and a Gopro adapter I don’t need.

Although the product specs mention compatibility only with iOS, the Bluetooth shutter works fine with Android. To pair it with your phone turn on Bluetooth discovery on the device, power up the shutter, and follow the prompts on Android.

The tripod is perfect for Astrophotography mode with the my Pixel. I can quickly set up the tripod and bring it to a balcony.

There’s a minor inconvenience, though. Even at full height, when pointing areas of the sky at high angular altitudes, viewing the phone’s screen is not much practical. I have to uncomfortably crouch or bend behind the screen.

#astronomy #Android

Discuss... Email | Reply @amoroso@fosstodon.org

Although I despise cutouts and holes in smartphone screens I bought a Google Pixel 7 Pro Obsidian Black to replace my old Pixel 4 XL.

Google Pixel 7 Pro product box

I hoped the Google Store would send me a discount but it never happened, I should have taken advantage of the Black Friday promotion just after the device's release. Anyway, I've been using the Pixel 7 Pro for the past week or so and these are my initial impressions.

Motivation

For my daily driver smartphone I've always wanted a high-specced, supported, Google-made flagship featuring the Google experience, so the Pixel 7 Pro was an obvious replacement for my end of life Pixel 4 XL.

I could have waited a few months for the upcoming Pixel 8 Pro but the early rumors hinted at a smaller screen. My ageing eyesight strongly prefers large screens, which made a difference in favor of the Pixel 7 Pro.

Another reason not to delay the purchase is that, much as I despise screen cutouts and holes, this design fad is likely here to stay for at least one product generation or two. Getting the Pixel 7 Pro minimizes screen defacement while letting me weather the storm and wait for more tasteful design trends.

Finally, I wanted the Pixel 7 Pro because I was eager to try astrophotography with better optical zoom, 5X versus 2X of the Pixel 4 XL.

Hardware

After several days the screen hole isn't bothering me as much as I expected. A related feature the reviewers of the Pixel 7 Pro frowned upon but I don't mind is the curved screen. It's not much noticeable to me and the thin bezel is enough to prevent most of the inadvertent screen touches.

The cheap, plastic touch of the screen is unusual but I guess this is the kind of tactile experience the material of curved panels is supposed to give. Still, it contrasts with the thicker glass feel of the Pixel 4 XL screen.

Speaking of the screen, the integrated fingerprint reader is okay but not as accurate and fast as I hoped. I'll miss the lightning fast and accurate screen unlock of the Pixel 4 XL. I think I won't turn on face unlock on the Pixel 7 Pro as it's not supported for biometric authentication, so it may not help much.

Another love or hate design feature is the sensor pod. So far I'm in the don't mind camp.

While optical zoom is important to me, I'm liking the 0.5 X wide angle lens too which, until last year, I didn't have a use for. Then I did a dream trip to the Space Coast and a wide angle lens would have come in handy for photographing space technology subjects.

In ordinary use the Pixel 7 Pro doesn't seem much faster than the Pixel 4 XL, but the former makes a difference for resource-intensive apps and runs them more smoothly, with less lag and jankiness.

Software

On the Pixel 4 XL I was already using Android 13, the same version currently on the Pixel 7 Pro, so there are no significant differences.

The experience of setting up the Pixel 7 Pro, configuring the apps, and performing system updates was similar too. It took 6-8 hours most of which spent migrating banking and credential management apps, each with its own complicated, idiosyncratic, and poorly documented migration procedure.

The Android system updates were excruciatingly slow when setting up the Pixel 7 Pro, most likely because they were large and highly I/O bound.

Aside from these issues, I like Google's Android skin.

#Android

Discuss... Email | Reply @amoroso@fosstodon.org

When I researched a printer for my first Chromebox in 2015, going with a Brother HL-2340DW seemed like a no brainer.

It was one of the few affordable, wireless laser units with support for Google Cloud Print, then the only way of printing from chromeOS. Print quality is okay. But I never liked the HL-2340DW much as it's slow, and it often went into a deep sleep mode from which it was difficult to wake up.

When Google discontinued Cloud Print in 2020 I could still use the HL-2340DW from my new Chromebox via the IPP protocol, but the unit would often ignore print jobs. When printing from the Chromebox the HL-2340DW would acknowledge receiving the data, then just ignore the jobs and return to the ready state. No troubleshooting or combination of restarting chromeOS, the Chromebox, or the printer would help.

One of the times, exasperated, I initiated printing the Google Drive files I wanted from my Pixel 4 XL Android phone instead of the Chromebox. The printer worked flawlessly, and it has been from Android since then.

#chromeOS #Android

Discuss... Email | Reply @amoroso@fosstodon.org

Large tablets and desktop screens are the best for reading PDF ebooks and files.

However, a medium-size Android tablet is the next best thing as tweaking the Google Play Books reading settings provides an acceptable experience. Under these conditions, Google Play Books works better with PDFs than Kindle for Android.

This setup is helping me read more PDF ebooks unlike with my previous tablet, a 7” Lenovo Tab E7. On its small screen, the text of nearly all PDF ebooks and files was too small no matter what reading options were set. Landscape mode didn't help much.

Let’s see why PDFs require specific reading tools, what my setup is, and how I read PDFs.

Reflowable vs fixed-layout ebooks

With reflowable ebook file formats, such as ePub and Mobi, reading apps rearrange the text and other content to fit any screen size, much like web browsers do with HTML pages. Text fills the viewing area while maintaining a comfortable, legible size.

In fixed-layout ebooks like PDF files, the pages have a predetermined size and the text, images, and other document elements are fixed in size and laid out on the page at specific locations. The result looks like the pages of printed books. By default, reading apps zoom out the full page to fit the screen. The smaller the screen, the smaller the text. In addition, blank margins waste part of the page.

This makes it impractical to read PDFs on the screens of smartphones and small tablets. Reading apps allow zooming in the page until the text is legible. But, like looking through a keyhole, you view a small portion of the content at a time and have to drag around the page to bring into view the rest.

Minimum viable tablet

Up to the current one, I always owned 7” tablets like the Lenovo Tab E7.

While great for reflowable ebooks, a 7” screen is too small for comfortably reading nearly all PDFs. Even with the reading settings I discuss here, text remains small. The low resolution of cheap devices pixelates small text and doesn’t help legibility either.

After the Lenovo Tab E7, I switched to a Lenovo Tab M8 HD 8” tablet. An extra inch is enough to make a difference in the PDF reading experience. The screen has the right size so that the text area on the page, when zoomed in to fit the screen width, is large enough for comfortable reading. The low resolution of the Lenovo Tab M8 HD screen doesn’t affect legibility much, as the panel doesn’t degrade it.

With this 8” device, all it takes for a satisfactory experience with PDF files is to turn on two options of the Google Play Books reading settings.

Google Play Books reading settings

Two specific options improve the reading experience with Google Play Books. Although turning them on is a one-time action, there’s an adjustment I need to make at the beginning of every reading session of PDF ebooks.

The one-time options are accessible by opening a PDF book and tapping the page, which brings up the reading controls. Next, I tap the Aa icon and, under Zoom, turn on the Remember zoom and Tap to scroll options. These are the options on my Lenovo Tab M8 HD:

Google Play Books fixed layout reading controls on Android.

Once the one-time configuration is complete, the first thing to do at each new session is to pinch the page to zoom in until the text area fits the width of the screen, with little or no margin. The Remember zoom option preserves that width for the duration of the session. In the example of the previous screenshot, this is the page after zooming the page to fit:

PDF ebook adjusted to fit the screen in Google Play Books on Android.

In most cases, some vertical scrolling is still required to bring the bottom of the page into view.

When turning a page, the zoom level is usually reset and I’d have to drag the text area again to match it to the screen width. This is where the Tap to scroll option comes in, as it lets me scroll down and turn the page by tapping one of the screen's edges. The option takes care of maintaining the text area centered horizontally, with full lines always in view.

These settings and adjustments go a long way to enabling reading more content on compact and affordable devices.

#Android #ebooks

Discuss... Email | Reply @amoroso@fosstodon.org

A few years ago I bought a cheap Bluetooth keyboard from Amazon.it. At €14, it was mostly an impulse buy for exploring mobile typing on the go and similar settings, such as work stations with limited desk space. This is the device:

FREALL 7INKEYBD-BK 7" Bluetooth keyboard.

I initially used the keyboard with the Android tablet and smartphone I had at the time, a 7” Lenovo Tab E7 and a Pixel 2 XL. I later repurposed the keyboard for the devices I replaced those with, a Lenovo Tab M8 HD 8” tablet and a Pixel 4 XL smartphone. Here is the keyboard with the Lenovo Tab M8 HD:

FREALL 7INKEYBD-BK Bluetooth keyboard with a Lenovo Tab M8 HD 8" tablet.

Despite the simplicity, it took me some trial and error to figure how to pair the keyboard and what keystrokes insert the symbols I need, such as accented letters. So I’m posting these notes in case you come across the same or similar keyboards.

Hardware and packaging

The keyboard is a cheap, compact, plastic 7” chiclet unit that comes with a small foldable stand to hold a tablet or phone. To charge the keyboard I plug it into my Chromebox via the keyboard’s mini-USB port.

The product and packaging have no branding and Android identifies it simply as “Bluetooth Keyboard”. The Amazon listing indicates FREALL as the manufacturer and 7INKEYBD-BK as the model.

The instruction sheet isn’t of great help for learning how to operate the keyboard. The document is short, incomplete, and inaccurate. But reading the Amazon reviews helped me understand the pairing procedure. I discovered the rest by experimenting.

Pairing

Although the keyboard can work with different mobile and desktop operating systems, I use it only with Android and this is the experience I’m sharing here. To pair the keyboard with an Android device:

  1. turn on the keyboard
  2. on the keyboard, press CONNECT
  3. on Android, turn on Bluetooth and start the pairing flow
  4. on the keyboard, press Fn+Q
  5. on Android, tap the keyboard entry
  6. on the keyboard, type the pairing code Android prompts to enter
  7. on the keyboard, press Enter

After pairing is complete, on your Android device you’ll get a notification prompting to configure the keyboard by selecting a language and layout. This step may not be necessary.

From now on, to use the keyboard enable Bluetooth on Android and turn on the keyboard, which should connect automatically.

Keyboard shortcuts

The keys hold up to four labels for entering symbols, controlling media playback, or executing commands.

Accessing most of the symbols or functions of a key is often self-explanatory. For example, to type a blue symbol on a key, press that key while holding the modifier key with the blue Fn label.

Typing other characters or executing commands not printed on the keys is harder, so I include below some lists of useful keystrokes.

Symbols

You can directly insert the symbols in the following table by pressing the corresponding keystrokes. To type an accented character, press the keystroke that selects the accent you want and then press the character. For example, to get an e with a grave accent, è, press Alt +` and then e.

Keystroke Symbol
Alt+E é
Alt+ ` grave accent
Alt+U umlaut
Alt+I ~
Alt+S ß
Alt+c ç
Alt+N

Android commands and actions

The keyboard accepts the standard Android keyboard shortcuts. I found a few more and listed in the table below the ones that are handy, little known, or frequently used.

Launching apps

To launch one of these apps, here are the corresponding shortcuts:

Keystroke App
type search query Google Search
command Google Assistant
command+B Chrome
command+C Google Contacts
command+E Gmail
command+L Google Calendar
command+S Google Messages

Actions

The keyboard lets you invoke other Android features and navigation actions. Here are the ones I found:

Keystroke App
Alt in text field emoji selector
control+Enter set focus
command+Delete Back
command+Enter go to home screen
command+N open notifications shade

#Android

Discuss... Email | Reply @amoroso@fosstodon.org

Back when the Pixel 4 XL was Google's latest Android flagship, JR Raphael wrote a great piece on the insanity of smartphone screen notches and holes: The enduring absurdity of our smartphone bezel obsession. He pointed out the compromises punching holes into and cutting out screen areas in the name of no bezels imposes for little or no design gain, which often defeats the whole point of making those changes in the first place.

In the later article No, the Pixel 4’s bezels are not a major crime against smartphone design, Andy Boxall discussed why having bezels is not an issue and the dislike for bezels is largely irrational.

Beyond aesthetics, there are drawbacks to using a device with thin or no bezels.

I can’t tell how many times I inadvertently touched unwanted user interface elements of apps on my old Pixel 2 XL phone and my current Pixel 4 XL, which have some bezel. For example when I grab the device ringing for an incoming call, which often results in a declined call because I touch the wrong areas close to the edges of the screen.

Bezels actually have advantages as they can accommodate the parts screen notches and holes house, such as cameras and sensors.

I use only Google phones, despise screen notches and holes, and wish Google focused on substantial features such as improving optical zoom (Super Res Zoom doesn’t qualify) rather than chasing questionable design decisions and fads with collateral damage like missing bezels.

The Pixel 4 XL was Google's last phone with bezels and no screen mutilations. What I hoped was a fad turned into a design trend and later Pixels came with screen holes.

My Pixel 4 XL is close to the end of life and I need to replace it with the upcoming Pixel 7 Pro. Guess what? It has a screen hole, I'll have to deal with it and get the device anyway.

Stop mutilating screens. I want my bezels back.

#Android

Discuss... Email | Reply @amoroso@fosstodon.org

First reading about Flet made me jump over my chair as it's what I was long looking for, a solution to my web and Android development needs. Flet is an opinionated, Flutter-based GUI framework for creating multi-user web, desktop, and mobile applications.

What I was looking for is an easy way of creating simple web and Android apps in Python. Web frameworks such as Django are overkill and too low level for me, and in most cases require JavaScript or other non-Python frontend code.

As for mobile, although there are Python frameworks for Android development like Kiwi and BeeWare, they come with the ballast of a heavy Java and Android SDK toolchain.

Flet overcomes these issues. It enables creating web apps that hide a web framework under the hood. And, without touching Java, Flet can make also PWAs that run on Android and other mobile platforms. All from the same fully Python code base. Plus, deploying Flet web apps to my favorite Python environment, Replit, is well supported and straightforward.

I'm closely following the development of Flet and will experiment with the framework.

#Android #Python

Discuss... Email | Reply @amoroso@fosstodon.org

ChromeOS 104 delivered the ability to access USB serial devices from Android, an option for controlling the Z80-MBC2 computer from an Android terminal emulator app.

I didn't realize chromeOS 104 improved the support for accessing USB serial devices also from web apps implementing the WebUSB API. On my Chromebox, version 104 is the first that enables controlling the Z80-MBC2 from the web. Here's a CP/M 3.0 session in a serial terminal emulator web app:

USB Web Serial terminal emulator web app running a Z80-MBC2 CP/M 3.0 session on chromeOS.

Up to chromeOS 104, web terminals failed to connect to the Z80-MBC2 as they didn't detect the USB device. With version 104 I tested the following terminal apps, most of which work:

These apps operate the same way. A connection button brings up a system dialog listing the serial devices, like the Z80-MBC2's CP2102 chip. Once connected, the apps behave like other terminal emulators.

Although useful as an additional option for controlling the Z80-MBC2 on chromeOS, these web terminals are experimental or basic apps, have limited functionality, and miss major features like XMODEM file transfer.

#z80mbc2 #sbc #Android #chromeOS

Discuss... Email | Reply @amoroso@fosstodon.org